The skies were grey and rain was falling on Saturday morning when we all met in La Jolla for a coached mountain bike ride. We were all disappointed because, unlike the East Coast or Pacific Northwest where rain doesn't deter you from your appointment with the trail, in San Diego you don't ride when the trail is wet.
Because of the quality of the soil, bike tires leave ruts that destroy the trail. We wanted to ride, but knew we couldn't do so anywhere near the coast that morning. Laurie suggested that we head east to Mission Trails, near where she lives, since it wasn't raining there when she left. So we all caravanned to Mission Trails. Mission Trails is very beginner-friendly, with wide double track as well as flowy singletrack. Before leaving the parking lot, we discussed equestrian right-of-way, and what I call the mountain bike basics, or the beginner's mantra: "Pedals level, weight back, arms relaxed, shoulders square."
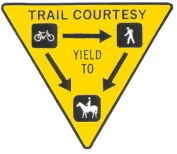
Horses on the trail
May of the trails in San Diego are multi-use trails, and cyclists often come upon hikers and horses. Because it's important to foster good relations between cyclists and other trail users, no one should ever hesitate to practice good trail etiquette. When coming upon horses from behind, I always call out: "Ride leader! There are four of us mountain bikers. May we pass?"
There is always a ride leader, even if it's an informal ride; someone will answer you. Calling out to the ride leader 1) lets the horse riders know you are coming so you don't surprise them, 2) identifies you as a person, since you do not look like a person to a horse, but a head on top of a bike, and 3) empowers the horse riders and shows them respect.
Slowing down or even dismounting and calling out to a group of horse riders may seem unusual, but it's important to remember that in addition to having the right-of-way, equestrians often have a lot more money and power than the mountain bikers. It's in our best interest to make sure we do all we can to foster good relations and practice good trail etiquette at all times.
Mountain bike instruction
Pedals level: Unlike on a road bike where you can coast with one foot down, you should get into the habit on a mountain bike of coasting with your pedals level. Not only does it keep you from striking obstacles like rocks and roots with your downward-extended pedal, it also facilitates you standing on your pedals, giving you greater control and allowing you to shift your weight as needed.
Weight back: This is mostly a reminder to shift your weight back on descents or when going over obstacles. More accurately, you push the handlebar away from you over obstacles, but weight back is the same idea. If you have your weight back, you have less of a chance of going over the bars.
Arms relaxed: Too many riders find themselves in the middle of a ride employing the "death grip" to the handlebar. You should be able to wiggle your fingers at any moment on the bike. Having a vice-like grip on the handlebar will only impair steering and bike handling. Your front wheel will often find the best path through a rock bed or sand. If you apply a light grip with your weight off the handlebar, you'll be more successful at navigating those tricky sections.
Shoulders square: If you keep your shoulders square to the trail and where you want to go, you'll have an easier time of actually going in the direction you want to go. With your head up, and your shoulders square to the trail, you and your bike are centered and where you need to be.
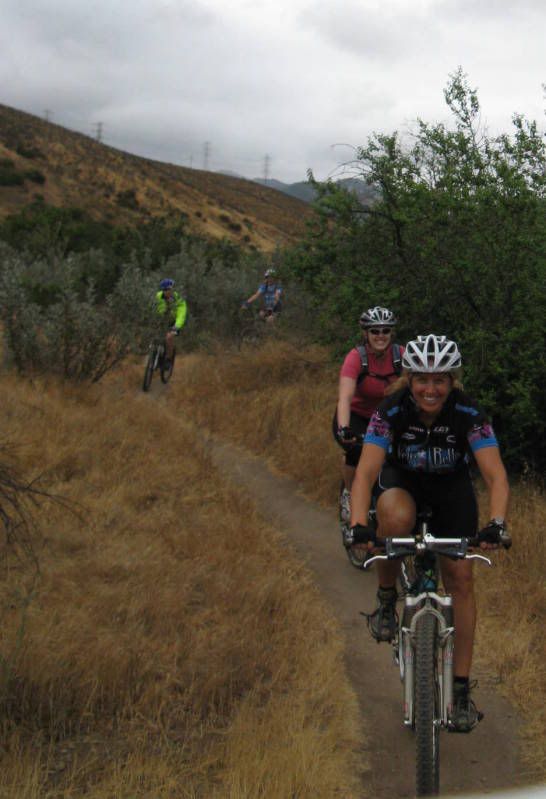
We rode for a bit on the doubletrack, then practiced getting our front tire over a stick - the beginnings of jumping with the bike. If you get your front tire over the stick, the rear tire will naturally follow. Those who mastered this early were encouraged to use their clip pedals to lift the rear tire over the stick as they went. The motion mimics that of a rabbit hopping over a log. Once you can pop the front tire up and the back tire up, you put the motions together. We didn't have time to work very long on bunnyhops, but everyone did really well and will be able to practice on her own for next time.
We only practiced two difficult climbs and descents. Most of the coaching involved helping the girls approach a hill in the right pedaling gear, knowing when to shift, knowing when to stand up, and refining the balance required so that you don't spin out before you reach the top. The descending skills involved reading the terrain, remembering to stay relaxed, proper body position on the bike, and the importance of not getting ahead of yourself (keeping your head up).
The response to the ride and the coaching was really positive, and I know everyone was proud of her efforts at the end of the ride. Everyone challenged herself and came away feeling more confident. :)
Monday, June 1, 2009
Saturday, May 9, 2009
Mission Bay to La Jolla
Great ride this morning from Mission Bay, around Fiesta Island, up to La Jolla, and back. We used little-known bike paths that allow you to stay off major roads but still maintain a direct route.
Our route.
It was a cool, foggy, chilly morning in San Diego as we met for a road ride from Mission Bay. In our pre-ride announcements, I took the opportunity to spread some of the word handed down from the Breast Cancer Fund, and mentioned the potential harmful effects of some sunscreens that contain parabens. We often don't think about the chemicals we put into our bodies via lotions, but transdermal absorption is very concentrated and should never be overlooked. To see whether the sunscreen you use is potentially harmful, go to cosmeticdatabase.com and enter the type you use. You'll be surprised.
Announcements out of the way, we made our way around Fiesta Island, a low-traffic area that affords cyclists and joggers a beautiful view of Mission Bay. Exiting the island, we headed north on Mission Bay Drive dodging the numerous joggers that seemed to be out in force! We must have seen 300 joggers throughout the course of the ride. It was great to see so many people getting outside to play.
At the northernmost point of Mission Bay, the cleverly hidden Rose Canyon Bike path exits the road and skirts the marshy inlet that leads to Pacific Beach. We followed the bike path to the end, crossed under I-5, the continued north on Santa Fe Street which dead ends at the bottom of the 52 Bike Path (right at CA-52). Closed to vehicular traffic, the 52 Bike Path takes you from the northern end of Mission Bay Drive all the way up to La Jolla/UTC, where you can then access roads that will take you to UCSD. We went up to the UC Cyclery Bike Shop to pop in and take a look around, then headed back to Fiesta Island.
Before leaving the bike shop, we took a minute to talk about proper shifting, making sure everyone understood the term "cross-chaining," and the importance of keeping low gears up front with low gears in the rear and high gears up front with high gears in the rear. It's a simple thing to do, but if no one has ever explained it to you, you figure that clicking noise coming from your front derailleur is just the way the bike is. At least, I did before it was explained to me.
On the way back, we had to go up a curb to access the bike path from the road. Most cyclists dismount and carry their bikes up the curb, then carry their bikes down the steps to the bike path, as the ramp is very steep and turns sharply. The first time I took this ride, I rode with three guys who all popped their front wheel up the curb and then rode down the ramp. I made a point to learn how to do it for the next time, and was soon popping my front wheel up curbs without thinking about it. Today I did this, hoping the other girls would either follow or say, like I did, "Hey! Are you allowed to do that?! Show me!" Sure enough, Rebecca was intrepid enough to ride down the steep ramp, looking through the turn and making the corner without issue. Triumph! As a bonus, when we returned to the parking lot she wanted to learn to pop her front wheel up the curb. Cool! A convert. Bwahahahaa!
It was a great ride at a social pace that was fun for our girls who had not been on the bike for a while, as well as provide some new challenges for our seasoned riders. No matter what ride you're on, there's always a skill you can practice or learn.
-Laura D.
Thursday, April 9, 2009
Great cycling articles!
With the new season starting up, I thought I'd post some great articles about group riding.
Basic Skills for Group Riding
By Gale Bernhardt
For Active.com
You don't have to be a competitive cyclist to enjoy the benefits of group rides. Utilized correctly, regular group sessions can motivate you, improve your fitness and make any ride more enjoyable. However, if you lack the technique or the fitness to ride with a group, the experience can be frustrating and leave you riding alone. In a worst case scenario, lack of skills causes you to crash, perhaps taking others down with you.
To help you get started, let's look at a few group ride basics... more
Riding in a Paceline is a Basic Cycling Skill
Edmund R. Burke, Ph.D. for Active.com
Why do many cyclists choose to go it alone when riding in club rides or centuries? Many group rides can turn into survival of the fittest, where the novice is quickly sent off the back.
Ideally, a group should contain both novices and experienced riders who don't feel compelled to prove themselves on every ride. The key is riding safely and effectively in a paceline... more.
10 Rules to Group Ride Like a Pro
By Simeon Green
PezCycling News
There are a series of basic rules to follow in order to ride properly in a group, and yet it is often surprising how few people know these rules.
You might think this doesn't apply to you; after all, you are a Cat. 1 and winner of the Thursday night or Saturday morning World Championships...so like I said, it's amazing how many people don't know how to ride in a group. If you are new to the sport, this will help for your next group ride, if you are old to the sport, this should be a useful recap of what you already know... more.
--------------
I found these articles really helpful! Hopefully you will too. More great info can be found at http://www.active.com/cycling
See you at a group ride! :)
-Laura
Subscribe to:
Posts (Atom)